Whilst doing the DIY carbon clean on my intake valves, and changing the spark plugs, I made the discovery that oil was leaking onto the spark plugs.
If not dealt with promptly, the leak could lead to serious engine problems that I definitely didn't want, nor could afford, to repair.

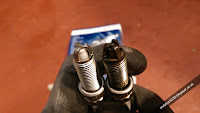
To recap, it was the third spark plug which, when removed, was coated in oil. You can see the colour difference compared to the new one below.If not dealt with promptly, the leak could lead to serious engine problems that I definitely didn't want, nor could afford, to repair.

After some research, a broken valve cover gasket was highlighted as the likely culprit, another common N54 problem, which would also explain the gunk on the front of my engine.
Once again I called BMW Hereford to order the genuine BMW part required, this time just a valve cover gasket (part number: 11127565286) at £37.09, as usual they provided a great service.
Similarly to cleaning the intake valves, a lot of the engine components need to be removed before you even get to the valve cover gasket. At least I was getting good value for money out of my Laser panel protector...
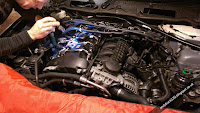
Here's my old man giving the job a good looking at - at this stage we'd removed the engine cover, air filter housing, right hand strut brace and were about to remove the ignition coils.
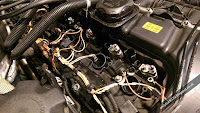
All the wiring going to the injectors has to be disconnected, the harness needs to be loosened too, so it gives you some wiggle room when removing the valve cover.
The vacuum hoses that run over the valve cover need to be removed, along with the vacuum tanks themselves, leaving a rather large hole in the front corner of the engine bay.
Next out was the main fuel rail and the pipes to each injector. There are two variants of high pressure fuel pipe, part number: 13534549606 is used for injectors 1 - 5, and part number: 13537552284 used for injector 6. To avoid any tears, experience has taught me to number up anything you remove.
After removing a few more electrical connectors and securing their harnesses out of harms way, and removing the injector sleeves, we were finally ready to remove the valve cover.
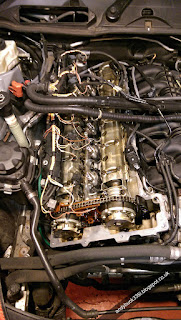
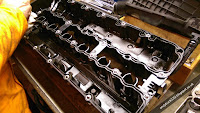
Unfortunately, the cover was not quite ready to be removed and was stuck fast, absolutely having none of it. However, some considerable amounts of swearing later, the valve cover was eventually removed revealing the N54's beautifully intricate cylinder head.
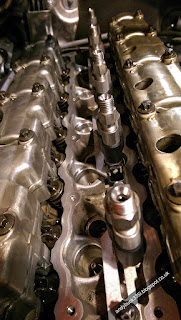
It was then a case of removing the old gasket and replacing it with the new one, making sure to clean up both the cylinder head mating surface and the valve cover seal groove.
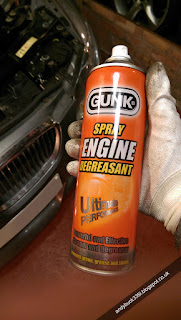
Thankfully, putting the valve cover back on was a lot easier than taking it off. Once seated down I took to cleaning up the front of the engine. Using some Gunk Spray Engine Degreasant - which is surprisingly effective and great for cleaning up engine bay plastics - and a rag I cleared away as much of the grime as possible.
Before and After
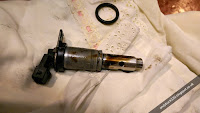
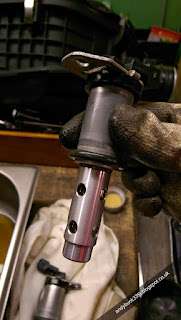
Now looking rather more respectable, I could remove the Vanos Solenoids without risking any grime falling into the cylinder head. Cleaning out the Vanos Solenoids is a recommended preventative measure for the N54, as they can be rather mischievous little blighters throwing up all sorts of errors. Should you need to replace the Vanos Solenoid, the part number is 11367585425 and it's O ring is 11367548459. Both intake and exhaust are the same part.
Using some left over Wynn's Air Intake & Carburettor Cleaner from cleaning the intake valves, I sprayed each of the Vanos Solenoids liberally and left them to dry. The last bit is important, the solenoids should be completely dry before refitting, you don't want any carb cleaner in the engine.
Before
After
Whilst the solenoids were drying we got to putting the rest of the engine back together. Although the solenoids are the same, I erred on the side of caution and fitted them back into the cylinder head in the same place they were removed from.
Frustratingly, this is one of those really labour intensive jobs that you don't really see any benefit from in performance, you just have to make do with the warm fuzzy feeling of preventing any future harm to the engine.
Don't forget to subscribe using the Follow by Email widget in the top right for plenty more content to come.









Did you use any sealant or RTV between the gasket and the head? I replaced mine June 2016 and now have a slight oil leak at the front of the engine near the Oil Filter Housing which I think is the cause of a slight stumble in idle.
ReplyDeleteHi there,
DeleteIt was a while back now, but I don't recall using anything other than the gasket mentioned (part number: 11127565286). I've just checked the guides I used and neither mention using any sealant.
They aren't a great design, so it could be that yours has failed again.
One other thing to check, have you replaced the oil filter housing gasket at all? These are prone to failing too, there are plenty of how to guides on the web if you do a bit of Googling.
Best of luck!
Cheers,
Andy.
Thanks Andy, yes recently had the OFH gasket replaced, it's definately the VCG. Looks like I need to do it again and maybe this time tap/block the vacuum holes in the head. Thing is these vacuum holes that go through the gasket to the check valve from the inlet valves, so any leaks can cause boost or vacuum leaks. Love your Blog BTW. Great stuff. I've had my 335i for 6 years now. Had Turbos, Injectors done etc. One thing I thoroughly recommend is RB's external PCV system with a catchcan. It almost eliminates the need for Walnut blasting the valves. I catch a lot of oil with it.
DeleteMatt
Ah sounds like you've had as much fun fixing yours as I have :D
DeleteGood shout on the catch can, I fitted the RB PCV, but the price of the catch can put me off. However, if it meant not having the walnut blast or even worse manually clean the valves like I did, it's worth every penny...
Thanks, there is plenty more content to come, I just struggle to find the time to type it up. Stay tuned for more soon (hopefully).
Good luck with the gasket replacement!
Cheers,
Andy.
This comment has been removed by the author.
ReplyDelete