Genuine BMW vs Fake Wheel Centre Caps: Are They Worth It?

Wheels are a major part of the exterior aesthetics of a car, even an immaculate example can be made to look shabby if the wheels aren't up to scratch.

The wheel centre caps on my 335i were looking a bit worse for wear, bubbling, corroded and dog eared from being removed a number of times. They were the older style too, showing the cars age.

Like most people I went straight on eBay and ordered a set of replacements, from a seller called asamuk2015, for the grand sum of £5.99 delivered. (Warning, read on to see why you should never order from this seller, or anyone selling fake centre caps).

Cracked BMW Alloy Wheel Repair

Selecta Tyre's procedure dictates that they give each wheel a thorough check over before carrying out any work. Makes sense really, it protects them from claims the workforce has damaged customer's property, and they might spot potentially dangerous faults then highlight them to the customer.

The latter is what happened to me whilst having four wheel alignment and rear tyres fitted.

Before fitting the rear left tyre I got called out to have a look at the rear left alloy.

Cracked BMW E92 335i Genuine BBS Style 230 Twist 19" Alloy

Not good news, it was quite badly cracked on the inner edge, something the early BMW BBS Style 230 19" Twist alloys are prone to.

Featured Website: RealOEM.com

For the second in the Featured Website series of posts, I've picked a real heavy hitter, RealOEM.com.

If you haven't heard of RealOEM, you in for a treat. As an owner of a BMW group product, this has to occupy your number one slot in your browser's favourites tab. It is the most useful resource for BMWs by a long shot, I can only dream of a site like it for my Audi S5.

RealOEM describes itself as a site that "...can be used to look up BMW part numbers and approximate part prices."

RealOEM.com homepage

After clicking here to enter, you're greeted with a few options on how you'd like to search.

You can use the last 7 digits of your VIN, a specific part number or all parts associated with your model from a specific build date.

For no other reason than I'm too lazy to remember my VIN, I tend to use the latter option, which is what I've used in the example below.

RealOEM.com model select page

Once you've picked your model, you're greeted with a bunch of subcategories.

RealOEM.com subcategories

Clicking on any of them will bring up all the schematics associated with that subcategory. Below, I've chosen the turbo charger, a page I became very familiar with after needing to replace my turbo's...

RealOEM.com 335i Turbo Schematic

Along with a labelled schematic, you get a table of parts, with added information such as; part number, fitted quantity, rough indication of cost in $ and if applicable, when the parts were in service. If you click on the numbers on the schematic, it highlights the row in the table that corresponds, in the screen grab above I've selected part 1, which turns the table row red.

Most of my time on RealOEM has been looking for the parts and part numbers relating to a certain fix I was carrying out at the time, such as when I replaced the valve cover gasket, but I also used it to find optional extras that I didn't have, i.e. features I could retrofit, the perfect example of this is when I fitted the cup holders to my E46 330d.

The icing on the cake for RealOEM is that some parts have a photo too, which is incredibly useful in helping to confirm you're ordering the correct part and identifying the part in the depths of your engine bay.

RealOEM.com part photo

I've (unfortunately) spent hours on RealOEM over the years, but it could have been a whole lot more time researching if it didn't exist and for that I'm very grateful.

Let me know in the comments below if RealOEM has ever saved your bacon, are there any other websites you think can top it?

Don't forget to subscribe using the Follow by Email widget in the top right for plenty more content to come.

New Goodyear Tyres and Four Wheel Alignment

I knew my rear tyres were getting towards the limit, so I fired up camskill's website to check what the damage on two new ones was going to be.

To start with I searched for Goodyear Eagle F1 Asymmetric 2's, after having such a good experience when fitting them to my E46 330d. Their grip was supreme in the dry and wet, and the longevity was superb, easily hitting 14k miles on the rear.

However, they'd now been superseded by the Asymmetric 3's.


Comparing the Asymmetric 2 with the 3's showed that Goodyear had made some notable improvements: fuel efficiency, moving up two categories from E to C, and road noise dropping one dB from 70 to 69, whilst maintaining an A rated wet grip. Although only 1dB improvement, don't assume that's a small amount as the decibel scale is logarithmic.


At the time, 2x 255/30 R19's were coming in around the £320 mark posted. To save the hassle of waiting in for them to be delivered, I went down to SelectaTyre and asked them if they could match camskill's price. When they first quoted £400+ I wasn't hopeful, but all credit to them, they got the price down to near enough £350 including fitting. 

Just to make sure he wasn't ordering the wrong size etc. he went out and checked my current tyres, clearly more thoroughly than I did as he came back in and said "did you know you're through to the wire on the inside edges?"

BMW E92 335i Rear Left Tyre Uneven Wear

BMW E92 335i Rear Right Tyre Uneven Wear

Ah, better book me in for four wheel alignment as well then.

To be honest, alignment was something I'd wanted to get done anyway, again after having such positive results on my E46 330d.

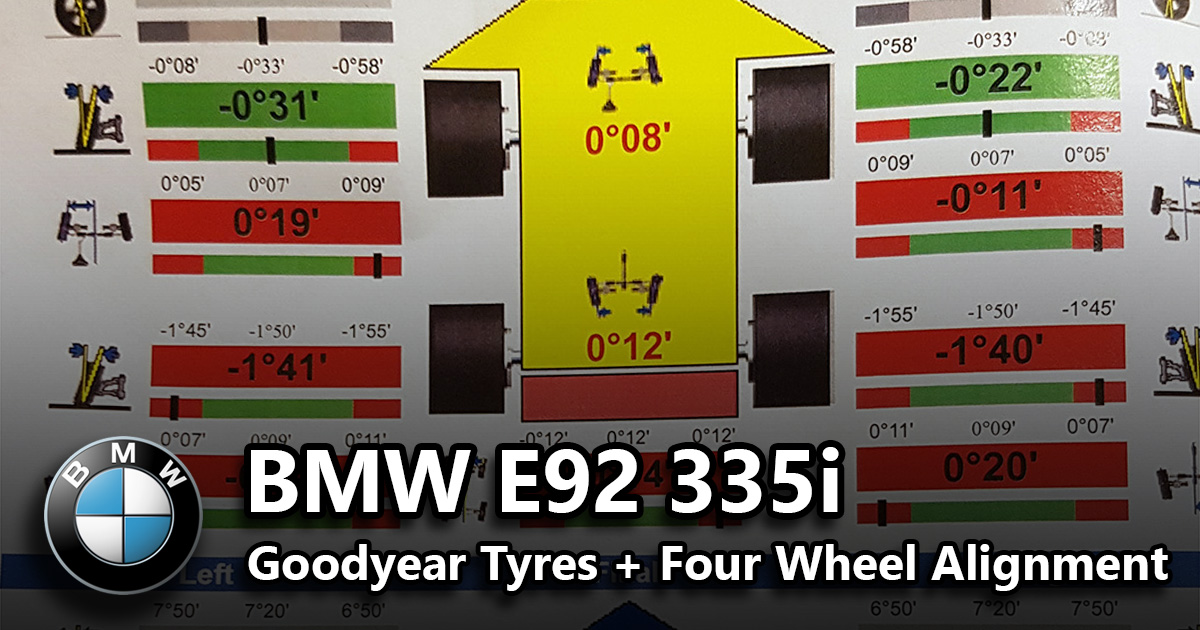
SelectaTyre's system is great too, it gives a full readout of before and after showing the tolerance zones of each adjustment; toe, thrust, camber and castor. As you can see in the print out below, the car was way off at the back.

SelectaTyre Four Wheel Alignment Print out

All in, the tyres, fitting and four wheel alignment came to £447.48. Rather more expensive than I'd hoped, but what a difference it has made to the car. I wasn't completely satisfied with the way the car had been turning into corners but now it was pin point accurate. The level of grip that was now available transformed the way the car moved round corners, feeling planted throughout.

I cannot recommend getting four wheel alignment carried out enough, even if you don't think there is a problem, get it checked. It's free to have it checked at SelectaTyre too, so no excuses!

Let me know what you think below, have you experienced a massive improvement after having alignment corrected? Got any horror stories of poor alignment eating your tyres?

Don't forget to subscribe using the Follow by Email widget in the top right for plenty more content to come!

Fixing The Steering Lock Faulty Warning For Free

At 6:45am in December, when it's freezing cold, dark and you've just pulled into the work's car park, the last thing you want from your car is a warning not to turn the engine off.

However, that's exactly the situation I was in. Not fancying leaving the car running for 9 hours, I took a photo of the warnings and headed on into work.

The full warning message read:

Steering lock faulty

Electronic steering wheel lock is not disabled once the engine has been switched off.
Engine cannot be restarted.
If the engine is running, do not switch off.

And was accompanied by a red warning icon of a padlock covering a steering wheel in the upper board computer display in the dials.

Dull Clouded Side Repeaters Replaced

Much the same as with the LED Angel Eye Upgrade, I needed to do something with the side repeaters to roll back the years.

The Sun had taken it's toll on the plastic lens and, somewhere along the line, the driver's side clip had been broken causing the rear end to stick out from the fender.

As I found out when replacing the side repeaters on my E46 330d, buy genuine BMW or don't bother.

I jumped on RealOEM and found out the part numbers, then called BMW for a quote.


E92 Voice Command List

So my 335i has voice control, which is a pretty cool feature but utterly useless if you've no idea what to say to it.

After some searching on the tinterwebs I gathered a list of valid commands, turns out there are a heck of a lot.

Apologies to the original authors but most of this list is unashamedly copied with pride, however, it should now form quite a comprehensive list.

I haven't tried all the commands, but they should work for any E90, E91, E92, E93 (i.e. E9X) with a CCC iDrive module, (I've also made a list for Non-iDrive cars at the bottom).

CCC = Car Communication Computer
  • Fitted to 3-Series E90/E91/E92/E93 manufactured until March 2007

CIC = Car Information Computer
  • Fitted to 3-Series E90/E91/E92/E93 manufactured from September 2008

The full list is included below, but I've provided a link to a printable cheat sheet too.

If you forget a command, you can say "Help" to get a full list of valid commands. On each individual menu screen you can say "Options" to get a list of valid commands for that particular iDrive area.

Note that some of these commands required a software update on the earlier cars to enable them. Some of the navigation commands may be region specific too.


BMW E92 iDrive Voice Command List (CCC)


Communication

“A to Z”
“Missed Calls”
“Phone”
“Received Calls”
“Redial”
“Top 10”

“Call [contact name]” or
“Dial [contact name]” or
“Dial [number]”


Entertainment

”Audio”
“Radio On”
“[FM/AM] Menu”
“FM All Stations”
“Station Name” or
“Change Station”
“Preset” or
“Choose Preset”
“[FM/AM] Presets”
“[FM/AM] Manual”
“AM Autostore”
“CD”
“CD Menu”
“CD Change Menu”
“CD Changer”
“CD [1-6]”
“CD [1-6] Track [number]”
“Track [number]”
“Audio Aux Menu”

“SAT Radio...”
“...Menu”
“...Presets”
“...All Channels”
“...Categories”

“Frequency...”
“...ninety seven point nine”

“DVD Player”
“DVD Player Menu”
“DVD track [number]”

“Weather Band menu”
“Weather Band on”
“Choose Weather Band Station”


Assistance Window

“Assistance Window...”
“...Map Facing North”
“...Arrow Display”
“...Perspective”
“...Current Position”
“...Trip Computer”
“...Onboard Computer”

Navigation

“Arrow Display”
“Current Position”
“Destination List“
“Enter Address”
“Info Menu”
“Input Map”
“Navigation Info [On/Off]”
“Navigation”
“New Destination”
“New Route”
“Repeat Navigation Info”
“Route Preference”
“Route”
“Scale [Miles/Feet]”
“[Start/Stop] Guidance”

“Address Book” or
“From Address Book”

“Map” or
“Map Facing North” or
“Map Direction of Travel” or
“Perspective”


Climate

“Vent Settings”
“Automatic Programs”


Onboard Info

“Car Data”
“Limit”
“Onboard Info”
“Stopwatch”
“Trip Computer”


i Menu

“BMW Service Settings”
“BMW Service”
“Brightness”
“Check Control Messages”
“Communication Settings”
“Date”
“Display Settings”
“Door Locks”
“Entertainment Settings”
“FTM”
“Languages”
“Lighting”
“PDC”
“Service Requirements”
“Service”
“Steering Wheel Buttons”
“Time”
“Units”

Those of you without iDrive (but with Bluetooth functionality) have a rather slimmed down list I'm afraid, it also only works for phone operations.


Non iDrive

“Correction”
“Delete”
“Delete Name”
“Delete Phone Book”
“Dial”
“Dial Name”
“Dial Number”
“Help”
“Quit”
“Read Phone Book”
“Redial”
“Store Name”


Let me know in the comments below which commands you find most useful, and if you can add to the list.

Featured Website: Bimmer.work

This post is a bit of a departure from the usual site content but hopefully something you'll find interesting.

I'm hoping to make Featured Websites a series of posts, each time bringing you a different site that I think has something unique or worthwhile sharing.

To kick off the series, the first featured site is called bimmer.work. It's a simple site, with a pretty cool function. It describes itself as a VIN decoder, but basically, you enter the last 7 digits of your VIN and it'll give you various details about the car. It works for BMW, MINI, Rolls Royce and BMW Motorcycles.

bimmer.work car details section

The data it spits out is split into four sections, the first contains generic details like engine code, paint colour and interior upholstery colour but also some more interesting details like which production plant the car came out of.

The second is an exterior, interior and 360° interior image of the car in the correct spec.

bimmer.work BMW E92 335i Coupe Black Leather Aluminium Interior image

It then details all the standard equipment and the optional extras that were selected. This would be particularly useful when selling a car, enabling you to write a better for sale ad.

It may also come in handy when you're buying cars, particularly at auction. Being able to confirm what options should be there could give a better insight into how much to pay, or if the car's been altered away from factory spec.

bimmer.work BMW E92 335i factory optional extra list

Let me know in the comments section below how you guys get on, and if you find out any interesting details about your car using this tool.

DIY Valve Cover Gasket Replacement and Vanos Solenoids Cleaned

Whilst doing the DIY carbon clean on my intake valves, and changing the spark plugs, I made the discovery that oil was leaking onto the spark plugs.

If not dealt with promptly, the leak could lead to serious engine problems that I definitely didn't want, nor could afford, to repair.


To recap, it was the third spark plug which, when removed, was coated in oil. You can see the colour difference compared to the new one below.

BMW E92 335i N54 Bosch ZGR6STE2 spark plugs used vs new

After some research, a broken valve cover gasket was highlighted as the likely culprit, another common N54 problem, which would also explain the gunk on the front of my engine.

BMW E92 335i N54 Leaking Valve Cover Gasket

Once again I called BMW Hereford to order the genuine BMW part required, this time just a valve cover gasket (part number: 11127565286) at £37.09, as usual they provided a great service.

Similarly to cleaning the intake valves, a lot of the engine components need to be removed before you even get to the valve cover gasket. At least I was getting good value for money out of my Laser panel protector...

Here's my old man giving the job a good looking at - at this stage we'd removed the engine cover, air filter housing, right hand strut brace and were about to remove the ignition coils.

BMW E92 335i N54 engine with cover removed

All the wiring going to the injectors has to be disconnected, the harness needs to be loosened too, so it gives you some wiggle room when removing the valve cover.

The vacuum hoses that run over the valve cover need to be removed, along with the vacuum tanks themselves, leaving a rather large hole in the front corner of the engine bay.

BMW E92 335i N54 vacuum tanks removed

Next out was the main fuel rail and the pipes to each injector. There are two variants of high pressure fuel pipe, part number: 13534549606 is used for injectors 1 - 5, and part number: 13537552284 used for injector 6. To avoid any tears, experience has taught me to number up anything you remove.

BMW E92 335i N54 High pressure fuel pipe and rail removedBMW E92 335i N54 High pressure fuel pipe and rail removed

BMW E92 335i N54 removing high pressure fuel railBMW E92 335i N54 high pressure fuel pipe 13534549606 13537552284

After removing a few more electrical connectors and securing their harnesses out of harms way, and removing the injector sleeves, we were finally ready to remove the valve cover.

Unfortunately, the cover was not quite ready to be removed and was stuck fast, absolutely having none of it. However, some considerable amounts of swearing later, the valve cover was eventually removed revealing the N54's beautifully intricate cylinder head.

BMW E92 335i N54 cylinder head exposed

It was then a case of removing the old gasket and replacing it with the new one, making sure to clean up both the cylinder head mating surface and the valve cover seal groove.

BMW E92 335i N54 valve coverBMW E92 335i N54 Cylinder Head Injectors Close Up

BMW E92 335i N54 Cylinder Head Injectors Close Up

Thankfully, putting the valve cover back on was a lot easier than taking it off. Once seated down I took to cleaning up the front of the engine. Using some Gunk Spray Engine Degreasant - which is surprisingly effective and great for cleaning up engine bay plastics - and a rag I cleared away as much of the grime as possible.

GUNK Spray Engine Degreasant

Before and After

BMW E92 335i N54 Leaking Valve Cover GasketBMW E92 335i N54 Vanos Solenoids in Cylinder Head

Now looking rather more respectable, I could remove the Vanos Solenoids without risking any grime falling into the cylinder head. Cleaning out the Vanos Solenoids is a recommended preventative measure for the N54, as they can be rather mischievous little blighters throwing up all sorts of errors. Should you need to replace the Vanos Solenoid, the part number is 11367585425 and it's O ring is 11367548459. Both intake and exhaust are the same part.

Using some left over Wynn's Air Intake & Carburettor Cleaner from cleaning the intake valves, I sprayed each of the Vanos Solenoids liberally and left them to dry. The last bit is important, the solenoids should be completely dry before refitting, you don't want any carb cleaner in the engine.

Before

BMW E92 335i N54 Dirty Oily Vanos Solenoid Removed 11367585425BMW E92 335i N54 Dirty Oily Vanos Solenoid Removed 11367585425

After

BMW E92 335i N54 Cleaned Vanos Solenoid 11367585425BMW E92 335i N54 Cleaned Vanos Solenoid 11367585425

Whilst the solenoids were drying we got to putting the rest of the engine back together. Although the solenoids are the same, I erred on the side of caution and fitted them back into the cylinder head in the same place they were removed from.

Frustratingly, this is one of those really labour intensive jobs that you don't really see any benefit from in performance, you just have to make do with the warm fuzzy feeling of preventing any future harm to the engine.

Don't forget to subscribe using the Follow by Email widget in the top right for plenty more content to come.

DIY Intake Valve Clean, New Spark Plugs and Rob Beck PCV Valve

As I mentioned in my post about having the turbos replaced, I wasn't happy with the cold start performance of the car. I felt it wasn't as smooth as I imagined a straight 6 engine, showing a shade over 40k miles on the clock, should be.

Several hours of investigation later, I concluded that carbon build up on the intake valves could be the culprit, the Achilles heel of direct injection engines. Basically, the byproduct of the combustion process leaves a carbon deposit on the intake valves and intake manifold, gumming them up and reducing airflow.


Most of the discussions on N54 engine carbon build up revolve around walnut blasting as the cure, a process similar to shot blasting, except the media doing the work is ground up walnut. The thinking behind walnut is that if any of it gets in the engine, it's not going to do any harm. The process is so effective that BMW have even made a special tool for the job (P/N: 81292208037). Trouble is, I couldn't find any one in the UK offering the service, only US and Australia. 

Unfortunately, I was going to have to roll up my sleeves and get stuck in, polishing and cleaning manually with wire brushes.

Whilst researching, I looked up any possible preventative actions I could take. I'd rather not have to clean the engine out every few thousand miles. One suggestion was to use an oil catch can, but they are pretty expensive, the Burger Motorsports catch can is $179, a bit too much having just shelled out £3000 on turbos. Happily though, the other suggestion that came up was to swap the standard PCV valve (Positive Crankcase Ventilation valve) for a Rob Beck PCV valve. These come in at a much more wallet friendly $40 plus $10 shipping to the UK.

N54 Rob Beck PCV Valve

I ordered one of those, then called the ever helpful BMW Hereford (who are now on my speed dial list) and ordered the following genuine BMW parts (full OEM part numbers in brackets). 
  • Throttle Body Seal (P/N: 13547522361)
  • Intake Manifold Seal (P/N: 11617547242)
  • Hex Bolt + Washer (P/N: 07119903918)
  • Hex Nut with Plate (P/N: 07129905541)
  • Vent Hose (P/N: 11157553949)

BMW E92 335i N54 genuine intake seals and fixing nuts and bolts

Total for all that posted? £63.01.

Finally, I ordered some new Bosch ZGR6STE2 spark plugs, as the car was over due a change. The spark plug service interval is 45k miles for the N54B30 engine, as stated in SI B 00 02 06.

Bosch ZGR6STE2 spark plugs

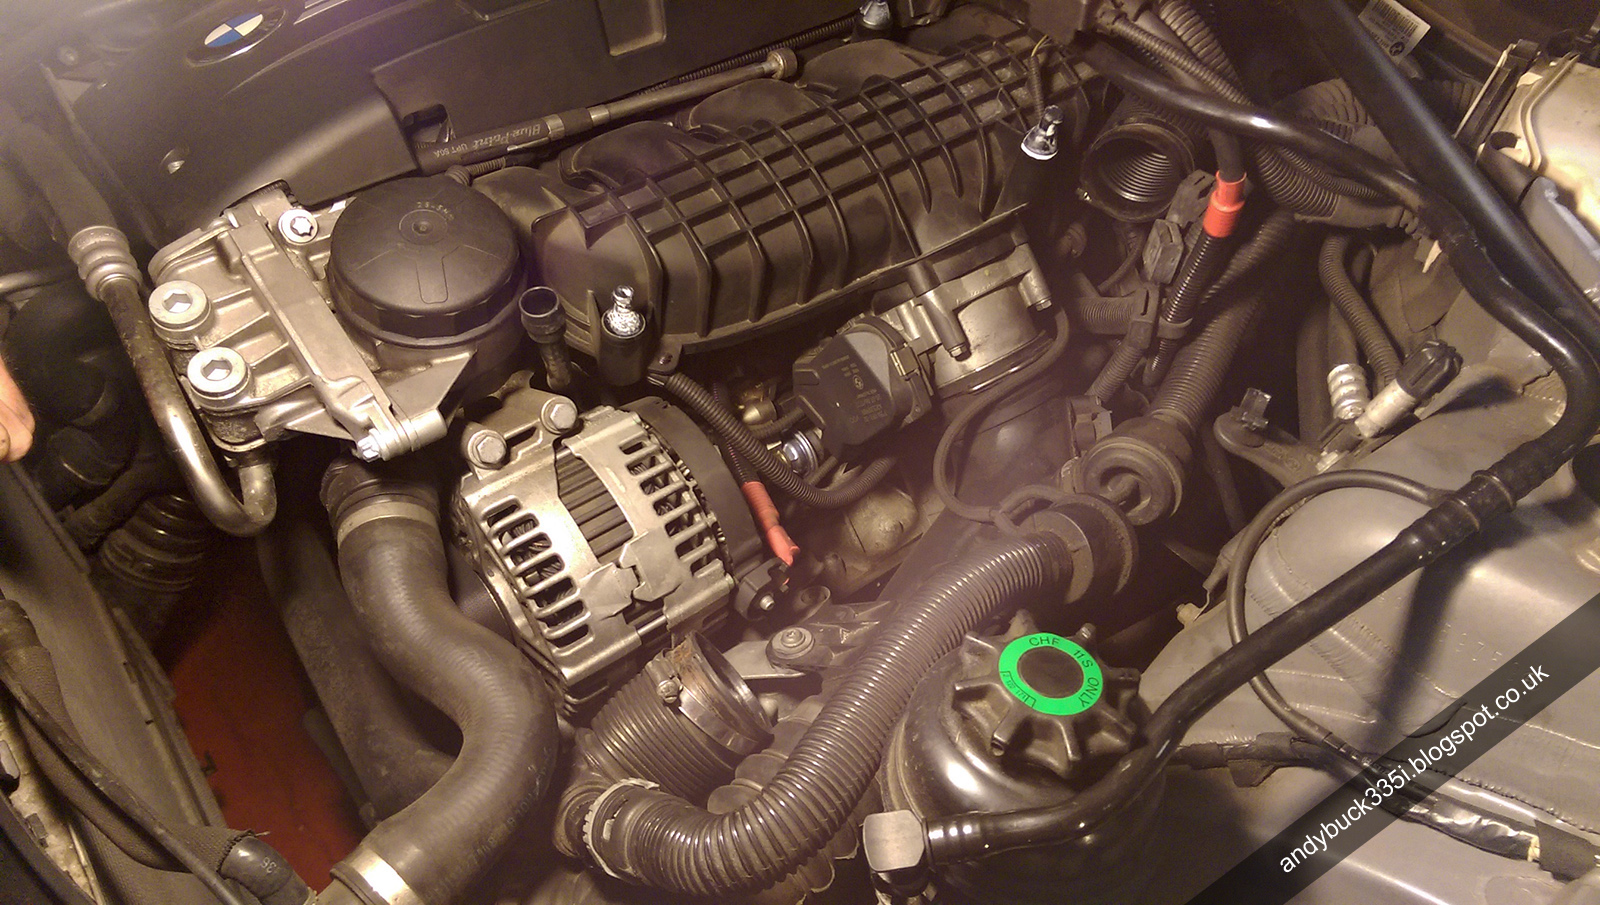
To get to the intakes a fair amount of the engine bay needs to be removed, the air filter housing, throttle body, charge pipe and intake manifold to name but a few.

BMW E92 335i N54 engine bay

The job was the perfect opportunity to use my new Laser panel protector though. Leaning over the fenders in zip up overalls is a recipe for scuffs, happily the Laser mat is large and thick enough to avoid that completely. I'd definitely recommend the home mechanic having one in their tool kit, whether it's Laser or not.

BMW E92 335i N54 intake ducting removedBMW E92 335i N54 air filter removed

BMW E92 335i N54 air filter housing removedBMW E92 335i N54 charge pipe removed

Whilst the throttle body was out I gave it a good clean and fitted the new seal.

BMW E92 335i N54 Throttle BodyBMW E92 335i N54 Throttle Body Cleaned

Next up was removing the electrical connector box from the tangs on the bottom of the intake manifold. This was an absolute pain in the backbox, in the end wedging some feeler gauges under the tabs and wiggling managed to free it.


About 2 hours into the job, there were only the bolts securing the intake manifold left to remove.

BMW E92 335i N54 intake manifold removed

To avoid any tears I taped off the cylinders next to the one I'd be working on.

BMW E92 335i N54 cylinders prepped for cleaning

Now the real hard work could begin. After hand cranking the engine to ensure cylinder 1's valves were firmly closed I filled the intake with Wynn's Air Intake & Carburettor Cleaner. This is some real good stuff, I was high as a kite on the fumes by the end of the job, make sure you've got good ventilation if you use it.

Wynn's Air Intake & Carburetta Cleaner

Using a combination of wire brush drill bits and Dremel bits purchased on eBay, each intake was cleaned as thoroughly as possible.

Wire brush drill bit

Dremel tool

The condition of the intakes after just over 45k miles was quite shocking, you can see just how gunked up they had become, and in stark contrast how well they came up after cleaning.

BMW E92 335i intake valve carbon build upBMW E92 335i intake valve carbon build up cleaned

The difficulty was getting to the inboard side of the valve, obscured by the stem, they are also a lot deeper into the block than they appear in the image, making accessing the job as well as being able to see what you're doing mutually exclusive, as you can see below.


Many hours later, all six intakes had been cleaned, some requiring higher levels of contortion to access than others.

Time to replace the spark plugs and fit the new Rob Beck PCV valve.

Replacing the PCV valve was fairly simple, it just requires unscrewing the retainer and switching out the PCV valve.

BMW E92 335i N54 PCV valveBMW E92 335i N54 Rob Beck PCV valve

BMW E92 335i N54 Rob Beck PCV valve into retainerFitting BMW E92 335i N54 Rob Beck PCV valve

Last but not least, the spark plugs. I chose to replace with OEM spec plugs, having read that 'upgrading' really wouldn't make any difference and would likely lead to a shorter life plug being installed. All was going well until I got to the third plug which, when removed, was coated in oil. You can see the colour difference compared to the new one.

BMW E92 335i N54 spark plug coils

BMW E92 335i N54 Bosch ZGR6STE2 spark plugs used vs newBMW E92 335i N54 Bosch ZGR6STE2 spark plugs used vs new

This is an indication of another common N54 problem, a leaking valve cover gasket, which was also the likely culprit of the gunk on the front of the engine.

BMW E92 335i N54 Leaking Valve Cover Gasket

Feeling rather deflated at finding another problem, I got the engine back together using all the new seals and bolts, then got started researching the next job.

BMW E92 335i N54 new intake manifold seals

Staying positive though, the car did feel better, the starting characteristics were much improved and preventative measures had been taken to avoid carbon build up in future, so not a total loss.

Let me know what you think in the comments below, have you attempted a DIY carbon clean? Was your engine's carbon build up even worse than mine?

Don't forget to subscribe using the Follow by Email widget in the top right for plenty more content to come.